There are plenty of good reasons homeowners elect to do their garage drywall. Many drywall contractors and professionals don’t want to quote and hang a single room, and it’s a great way to start if you’re getting into drywalling and construction. There’s nothing like having a functional, great-looking workshop and garage you finished with your own hands.
Whether you want to build your detached garage, refinish your attached garage, or convert your space into a good-looking and functional workshop, this article will walk you through how to install drywall in your garage.
Drywall can give a more finished look to a garage and help insulate for a comfortable workspace. If you want to hang shelves or decorations, starting with drywall is a must.
Learn what do you need to install drywall in a garage and a step-by-step walkthrough of the entire process.
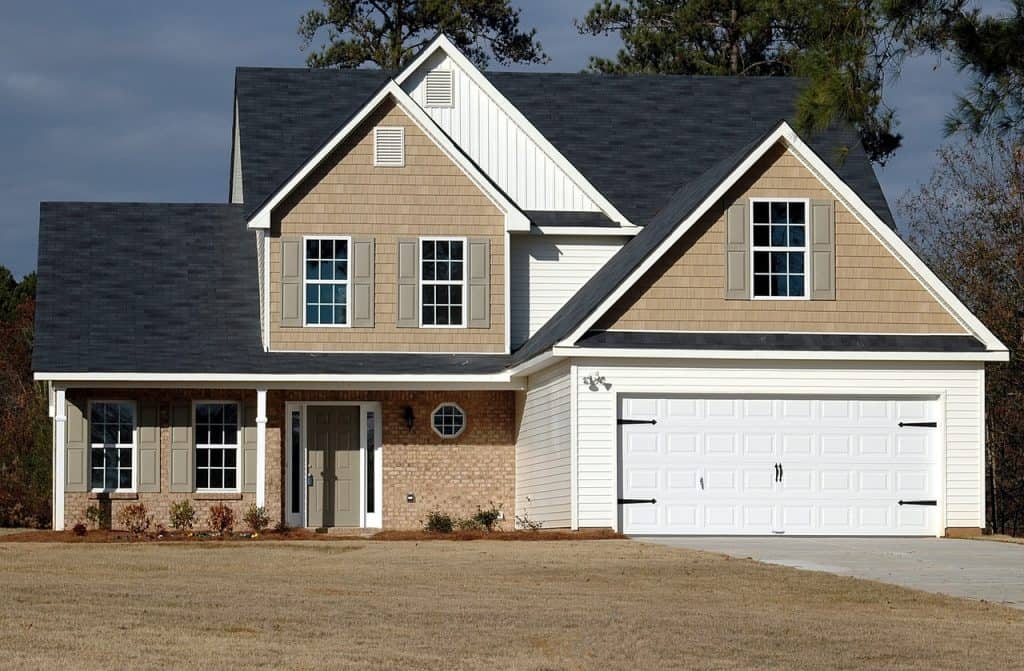
Table of Contents
What You’ll Need To Install Drywall
For the most part, installing drywall in a garage is the same as hanging drywall anywhere else. There are a few standard tools you might already have if you’ve done drywalling before and extra helpful tools to get high ceilings. The most essential, basic drywall tools you’ll need are:
- 5/8 inch Drywall sheets (take your square footage, divide by 32 and add a few sheets to cover mistakes)
- 1/2 inch drywall (optional, for walls not abutting the living space)
- Measuring tape
- Something to mark with (like a pencil)
- Drill with dimpler (like the Bosch Drywall Dimpler) OR drywall screwgun (Like this Dewalt Drywall Screwgun)
- Drywall screws
- Drywall T-square (Drywall T-squares are usually metal and much larger than regular t-squares)
- Utility knife
- Jab saw
Depending on how finished your garage already is, you may need a few other things. Power tools and specialty drywall equipment can be expensive and significantly drive up the cost to drywall your garage. Most of these can be rented, however, but still aren’t necessary. It all depends on how much time and effort you want to cut out of your drywall installation.
- Drywall screwgun
- Drywall & panel lift hoist
- Roto Zip (Also called a rotary saw, like this DEWALT 5 Amp Saw)
- Shop-Vac
How To Install Drywall
This is an excellent step-by-step instructional on the basic installation of drywall. You can follow these steps in your garage as long as you pay attention to the specific building codes in your area.
How To Install Drywall In A Garage
Installing and finishing the drywall in a garage is much like installing drywall anywhere else in the home or commercial site. The most significant difference might be the height of the ceiling and possibly the type of drywall you choose to use. Building codes differ between areas and usually require some measure of fire-safety.
Step 1) Get to know your area’s building code
The average DIYer might not be 100% up on local codes. Detached garages will likely need a permit and may have different requirements from your attached garages. Some areas require fire-resistant drywall on ceilings and the wall abutting a living space, some areas allow those walls to be regular 5/8-inch drywall, and some places allow you to double up ½ inch drywall to meet the fire-retardant requirement. Always follow building codes for your area and plan accordingly.
Step 2) Prepare your garage walls and work area
Check to see if the ceiling is straight by holding an eight-foot level against it or a long piece of plywood. Uneven straps should be fixed with shims before you begin hanging drywall, or the ceiling will look very uneven.
Check for any nails left in the frame. Preferably, you should pull them out, but if they’re stuck in there, you can pound the nails in flush with the wood.
Put on your mask, gloves (if working with insulation), and eye protection. Installing drywall creates a lot of dust that irritates eyes and lungs, and wear closed-toed shoes, especially if working alone – drywall might not seem that heavy until you drop a 50-70 lb panel on your foot. Make sure there is adequate ventilation at all times in the garage.
Do you still need insulation? If you’re insulating your garage and it’s not already installed, now is the time to add insulation. Use fiberglass insulation – these insulation batts come pre-cut or in rolls and only take minutes to install between joints.
Step 3) Trim Your Drywall
Measure your room and cut sheets of drywall about 1/4 inch shorter. Plan on hanging your drywall horizontally – seams will be at a more convenient height and contrary to the strapping and studs. Drywall should always end in the middle of a joist or strapping. If your sheets of drywall don’t end on a joist, measure to the nearest joist/strapping, and using your drywall t-square and utility knife, trim the drywall.
To cut your drywall, use a sharp utility knife. Use the T-square to drag the utility knife firmly but evenly across the entire sheet of drywall. You only need to cut through the paper – don’t sink your knife through the gypsum layer because it will quickly dull the blade. Once you’ve scored the drywall all the way across, you should be able to bend and snap off the end of the drywall.
You will have to cut one of the lines with a drywall knife for corners – it won’t snap off. When you’ve got a clean-cut through one leg of the corner, you can score the other leg with a utility knife and snap off the corner piece. Use the drywall saw to clean up the newly formed inside corner.
There should always be a space between sheets of drywall and the garage floor to account for bumps, imperfections in the flooring and non-square rooms. When taking measurements, allow for about a 1/2 inch gap between the drywall panels and floor.
Step 4) Attach the drywall
Start with the garage ceiling on an upper corner. This is where a drywall panel lift will come in handy, but you can do it with a friend. If you’re using a panel lift, crank the ceiling panel and align it to a corner. If you have a friend, one person should hold the drywall sheet secure against the strapping, and the other should quickly attach the drywall with drywall screws, just a few on each side, so the holder doesn’t get burnt out. If you’re doing the ceiling alone, you can place one or two holding pegs as per the video. Take a block of wood and screw it loosely into the strapping four feet away from the wall – this will swing in and hold the panel in place as you attach it.
For the ceiling, you should be using 5/8-inch drywall. If there is a living space above the garage, it’s likely a requirement, and besides that, thicker drywall will prevent sagging against the strapping. Each panel will be significantly heavier than your standard 1/2 inch drywall, so a drywall lift (or a friend) is recommended.
Put in screws around the perimeter, one for each strap, so you can mark where to attach the next panel. This is where having a simpler or, better yet, a drywall screwgun is important. A simpler is a simple attachment that fits a standard power drill and stops each screw at a certain depth. They’re a very cheap option, and you can get one at your local hardware store for around $10. A screwgun with variable speed would also work, but be careful not to drive screws too deep.
When you’re driving screws into drywall panels, you want to sink them flush with the drywall paper. Too deep, and the screws will rip through the paper and won’t be supporting the drywall – you’ll have to add another screw. Not deep enough, and you’ll get clickers that will be difficult to mud.
As you’re attaching the drywall, be sure to mark in pencil where outlets, cans, and electrical boxes are so that you can cut out holes. Measure the distance from two walls, and make a note somewhere on the drywall panel.
Step 4) Cut out holes
Cut as you go. You’re much more likely to forget a lighting fixture or box if you save all the cutting until after you’ve attached all the drywall. This is especially important if your boxes aren’t recessed enough and you have to bend the drywall over them.
If you have a roto zip, make a pilot hole in the center where you measured and marked, drag the tool outwards until it hits the outside of the box, and drag it clockwise around the perimeter.
If you don’t have a power roto zip, use your jab knife in the same way. Pierce the center and saw towards the outside. The trick with a jab knife in a small area is to saw quickly in short strokes. Always be very careful when manually sawing with a drywall knife.
Cut around doors and windows as you come to them. Never let a drywall seam end at a door or window. Cut each sheet of the drywall as you hang it against a door or window.
Finishing Your Garage
If your goal was to cover insulation or comply with fire codes, then there is nothing else you have to do. However, bare drywall will deteriorate over time as it’s exposed to moisture and is quite brittle. To protect your walls and give your garage a smooth finish, there are many great choices for finishing raw drywall depending on how much money and time you’re willing to spend.
Paint
One of the most cost-effective ways to finish drywall is with a good old coat of paint. It’s a little trickier than it seems and requires significantly more supplies, including specialty drywall tools. To prepare your drywall for the paint, you’ll need:
- Paper drywall tape
- Drywall joint compound (also called drywall mud)
- Corner bead (for outside corners)
- Sanding pole (or sponge for wet sanding)
- Sandpaper
- Putty knife
- Paint
Preparing drywall for paint can be tricky and time-consuming. There are tons of great online resources that walk you through step by step. The best thing you can do to prepare for a smooth-looking paint finish is to double-check your screws by running a putty knife over them, making sure you don’t have any “clickers” or screws sticking out too far.
PVC and Plastic Wall Slats
If you’re looking for something super easy pre-fabricated wall slats, attach directly to studs or on top of the drywall. The great thing about PVC slats is that they are quick and easy to install, you don’t have to finish your drywall or add coats of paint, and they provide protection against water and moisture. They are designed to incorporate shelving and hooks – snap them on. It makes your garage very versatile with having to make, buy or install shelving. The big downside is the cost of these, though they should last you a long time.
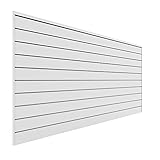
- 8 ft. x 4 ft. Installed (32 sq. ft.) includes all required trims and hardware for installation (Composed of 10 individual Slatwall panels)
- Holds up to 75 lb. (34 kg) per square foot
- Installed directly to studs or over drywall into studs
Corkboard
Another option you can use to finish your garage is a simple corkboard. It usually comes in different colors and installs right over studs or bare drywall. It is much cheaper than the metal or plastic slats, but it is not moisture resistant and is not recommended for the lower half of your garage, where it could get splashed with water.
Did this article answer all of your questions about how to install drywall in your garage? With the right tools and supplies (and maybe a helping hand), your garage drywall project should come together in a snap. Make sure you have the essential tools before you begin, and watch the tutorial to decide if you want to invest in some specialty drywall tools to make this and future projects much easier and quicker.
How (and if) you decide to finish your garage is up to you, but hopefully, this article gives you a good start on installing drywall in your garage.