The last thing you want is to step back from your drywall job and see a bunch of drywall seams.
These seams are often a real eyesore and can detract from how you’re painting and decorating your wall once the drywall is in place and set.
A botched installation can lead to drywall seams, but stress is another common culprit. Shifts in temperature and even the effect of time can create extra stress on the seams in the drywall, creating drywall cracks or bulging. Seams are also sometimes visible due to the drywall tape on them.
Luckily, you aren’t entirely out of luck if you want to avoid or resolve these issues.
Keep reading, and we’ll look at how to tackle a less-than-smooth finish on your drywall joints.
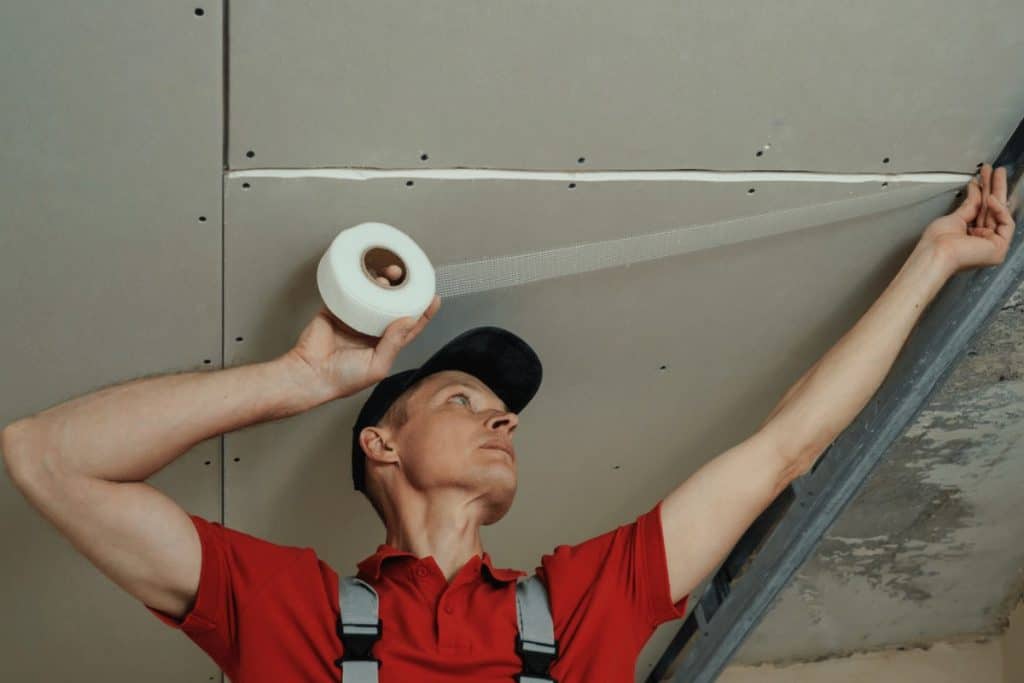
Table of Contents
Why Can I See Drywall Seams?
There are a few different reasons you might start to notice your drywall seams more than is ideal.
Drywall seams can become more pronounced as a house settles or due to stress like fluctuations in temperature, which can cause your drywall to warp and lead to bulging or cracking sheets of drywall, especially at the seams.
Drywall seams near windows and doors are more likely to suffer damage due to temperature fluctuations.
Related: Do doors go in before or after drywall?
Speaking of temperatures, learn more about how hot drywall can get in our article.
The use of mesh tape in installation can lead to visible seams later on.
Paper tape is often favored because mesh stretches and loses its strength over time.
If the drywall seam is visible from the beginning, the likely culprit is a mistake in installation.
Not properly sanding the area or not taking a few extra seconds to smooth out the paper tape applied with the drywall mud can create texture between drywall and the primer and the type of paint applied to it.
Similarly, you won’t want to skip any of the sanding necessary for putting up or repairing your drywall.
This massively helps give your wall a flat seamless appearance, so it’s an important step in making sure drywall seams aren’t visible.
How Do You Keep Drywall Tape from Showing Up?
Smoothing out and hiding drywall tape properly is crucial.
Otherwise, you’ll see it even when you’ve completed the wall and painted it.
Whether you’re using paper tape or mesh tape, you’ll want to make sure you use a wider final layer of drywall mud with a wider drywall knife with smoothed edges.
Opting for a 10″-inch drywall knife or even a 12″-inch drywall knife, it will be a lot easier to create a smooth finish.
Check out this drywall knife on Amazon if you don’t have a good one at home.
If you’re using paper tape, you’ll want to smooth the paper tape down with your drywall knife.
If you don’t, the excess mud can create an uneven texture below each layer of paper drywall tape, making the seam more visible.
Another way to help hide drywall seams and any other imperfections you might see is to add a skim coat to your drywall.
This technique, sometimes known as a level 5 drywall finish, is usually reserved for places where you would notice drywall imperfections, such as areas under direct light.
Is It Okay to Have Gaps in Drywall?
Yes! Having the proper gaps in your drywall can help you keep a smooth finish at the seams, and it’s a step a drywall contractor would likely take.
When you fit a drywall panel where you need it to go, don’t cut the exact size you need.
Instead, cut the panels to leave a little room around the edges.
This should be about ⅛”-inch of space on each side for a wall.
These gaps will help prevent you from damaging the drywall as you place it.
If the fit is too tight, you’re likely to see damage or bulging at the seams.
The last thing you want to add to your plate is a repair of broken drywall before you’re even finished installing it.
To ensure these gaps don’t create indents at the seams of your drywall, use a joint compound and drywall tape to ensure smooth finish levels.
How Do You Fix Drywall Seams?
If you notice your drywall seams are uneven or bulging, the first thing to do is grab a 4″-inch drywall knife.
This will help you cut and remove the drywall tape and any extra joint compounds or mud flaking and falling away from the seam.
Especially when it comes to a bulging drywall seam, sanding is crucial.
Use 120-grit sandpaper to gently smooth out the drywall surface.
Once you’ve done this, select a primer and apply it over the joint in the drywall.
For the best results, add about 2″ extra inches on either side of the seam for fuller coverage.
After the primer has dried, grab your drywall knife and apply joint compounds in a thick layer.
Next, replace the paper drywall tape where you removed it earlier if you need to.
Smooth the paper down and add another coat of compound.
Once the subsequent coats dry, add a final layer of all-purpose joint compound.
This time, opt for a wider knife to smooth the seam out as much as possible.
When all of your last layer of all-purpose joint compound is dry, grab your 120-grit sandpaper again.
Use this to smooth out the area and give you a flat plane to paint over.
Make sure to wash your entire wall before you start repainting.
Otherwise, you risk painting those imperfections into place rather than hiding them.
This is especially important when not using flat paint with a matte finish.
Painting with a primer and then painting with a glossy top-coat is more likely to highlight imperfections which washing the wall can help decrease.
Remember, imperfections are more likely to show up if your wall is in a highly visible part of your home, such as under direct light.
Related: What grit sandpaper for drywall?