Taking on a drywall project is a common home improvement task among homeowners.
If you are doing drywall installation for the first time, there are many structural things to consider.
When putting up the drywall panels, you may wonder if drywall edges need to fall directly on wooden studs.
Drywall seams should fall on studs as often as possible. The studs offer structural integrity and ensure the longevity of your wall and the joint. If the drywall edges do not fall on studs or aren’t mounted to structural members, the joints will not stay secure over time.
Finding studs or structural members to install drywall seams onto is of utmost importance to the integrity and strength of the wall.
Let’s consider the importance of making sure drywall edges land on wooden studs.
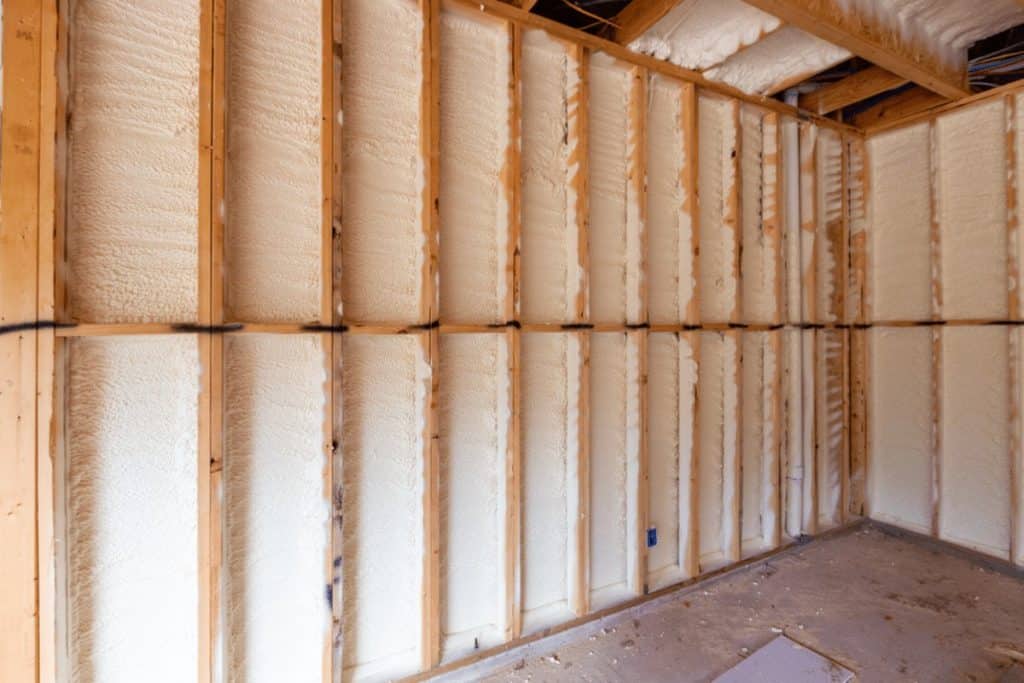
Should Drywall Seams Be Installed On Wooden Studs?
When installing a drywall sheet, it should always fall on wooden studs or other structural members.
The drywall sheets are heavy and require the structural support of the studs to be properly held in place.
Make sure the edges of each of your sheets of drywall land centered on the stud, so you get a good screw to hold the piece of drywall in place.
If there is no wall stud to attach the drywall seam to, they won’t hold together and will not result in a quality look.
It helps to base your drywall joints on stud locations.
Finding the stud locations allows you to properly layout drywall before installation to ensure they line up correctly.
Drywall without studs won’t hold up over time.
If the edges of the drywall pieces land on the beams, horizontal beams may allow additional support.
The beams must be load bearing to support the gypsum boards as they are heavy items.
What Should I Do If Drywall Edges Don’t Fall On Studs?
If a drywall installer finds themselves in a situation where they cannot get the drywall’s seams over wood studs, they have a few options to make it work.
Getting butt joints and drywall seams to line up on some sort of load-bearing structural member is important to the quality of the drywall job.
There is no way around having some sort of support for the seams, but there are ways to provide the necessary structural integrity to drywall sheets.
Cut The Drywall Panel Down
One of the best ways to get the drywall walls to look great and last a long time is to cut the drywall panels down to the correct size.
If a 54″-in.-wide drywall sheet doesn’t allow the butt joints to sit on a wooden stud, cut the panel down, so the panels fit correctly.
This will help ensure you don’t install any drywall sheets without studs to support them.
There are a few ways to cut gypsum board down to the correct size.
The drywall thickness will determine the best way to get it down to the correct size to fall on the correct inches in the center of a stud.
A utility knife should be enough for 3⁄8″-inch thick gypsum panels to get the desired width.
It is important to place the gypsum panel on a flat surface when cutting it down to prevent any unwanted folding, crumbling, or breaking.
Add More Studs
Another way to get your drywall panels to have the structural support they need is to add an extra stud.
To add an extra stud, you’ll need to fix the stud to the existing framing, which is strong enough to support the drywall.
This is done by attaching the horizontal beams and the top and bottom wood framing.
Adding extra studs to an existing wall is a bit of a project and will take extra steps, but it will help get the job done well.
If you are not interested in adding more studs to your wall, cutting the drywall panels down to size is a much better option.
How Do I Cover Up Drywall Seams?
Once you get the drywall panels lined up and attached to the appropriate studs or structural members, you’ll want to cover up the drywall seams for a seamless and professional finish.
There are a few extra steps to make it look perfect.
Covering drywall seams requires joint compound and sanding until achieving a smooth finish.
Drywall finishing is often the trickiest part of the entire installation process.
It is important to take your time to make sure the finished product is high-quality and aesthetically pleasing.
Here is a breakdown of the main steps for covering up drywall seams.
If you need help troubleshooting seam problems, check out our post on why you’re able to see drywall seams.
Fill Drywall Seams With Drywall Mud and Paper Tape
The first step to covering up drywall seams is to apply drywall tape and mud to the edges of where the panels meet.
Some tape is self-adhesive, while others require mud to properly attach to the wall.
Some people find butt joints to be very challenging to cover up.
A trick of the trade is to taper the edges with a utility knife at a 45°-degree angle.
This makes it much easier to fill the crack than two edges pressed up against each other.
Without the tapered edge, it is much more likely to have bulging of drywall seams.
Further reading: Why does drywall have tapered edges?
Sand Down Drywall Mud After Letting It Dry
Once the first layer of drywall mud has dried, it is time to sand it down.
Start with a heavier grit and work your way to finer grits to get a nice finish.
It helps to have a light angled up at the wall to see where you still need to sand.
It is easy to over-sand the drywall and damage the paper layer on the panels.
Using the light helps keep this from happening as you get a better look at which areas need sanding and which don’t.
Repeat The Process Until A Smooth Finish Is Achieved
Most drywall installers require 2-3 drywall mud and sanding applications to get a perfect finish.
Experience helps in achieving a perfect finish.
If you are a beginner, take your time and be patient.
It may take quite a few applications of drywall mud to get it right.